RJ Cole Winery

Insights into the world of an amateur home winemaker.

Name:
Location: Charlotte, North Carolina, United States

Cole Wines anagrams to Senile Cow.

Friday, June 30, 2006

Pumpkin Bottled!

Last night I got my Pumpkin Wine all bottled finally! That's right, the wine that got this blog started is nearing completion! 9 months almost to the day after I started the wine, all that is left to do is wait for it to mature in the bottle.

I bottled 20 total 750 mL bottles - 18 were the Cobalt Blue Hock Style bottles and 2 were clear Bordeaux bottles - so I could see the wine to show it off, it was too pretty to hide! I also bottled 6 375 mL bottles with a 7th bottle about 3/4 of the way full. I went ahead and put this in the fridge to chill for early sampling - that will also give me an idea of whether this wine will be better chilled or room temperature. All my samplings so far have only been at room temp. The 375 mL bottles were all Cobalt Blue Hock bottles.

I don't have any photos yet of these bottles of wine, but I will get some and post them. I still need to get labels made and buy some shrink wrap capsules for the tops. So once I get those, I'll take more photos and post them as well.

Since I won't have any more updates on the Pumpkin Wine (except for photos) until it's finally time to open the first bottle, I will add links to this post to all of my posts that have mentions of working with the pumpkin wine. This post will become "Pumpkin Central".

Recipe for Pumpkin Wine
Shopping and Prep
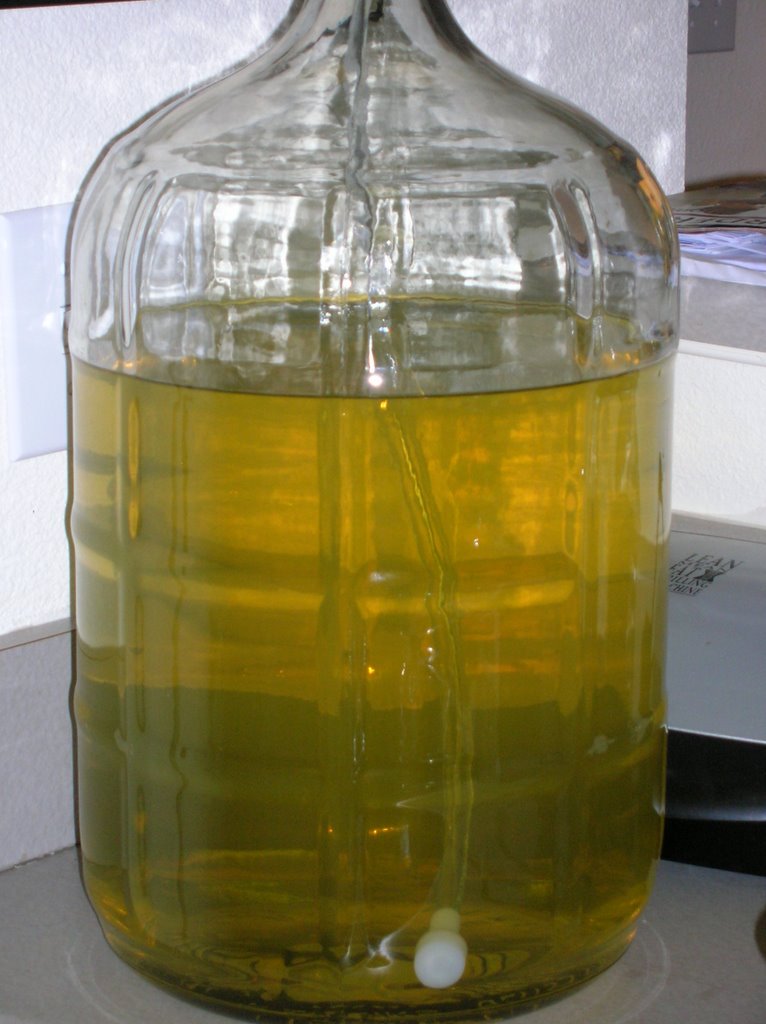
Pumpkin Must - no yeast yet
Primary Fermentation Day 1
Day 4
Day 6
Into the Secondary
Day 12
Day 14
End of Fermentation
First Rack
2nd Rack
Pumpkin Pictures 1
Pumpkin Pictures 2
Pumpkin Pictures 3
Pumpkin Update 2/14
Pumpkin Update 5/26
Sparkolloid Fining
Still not clear
Ideas for clearing
June 11th
Pumpkin Wine Filtering

That's it for now!

Wednesday, June 28, 2006

Working with the Longest Named Wine in the World

That is to say, the Winexpert Selection Limited Edition Chilean Maipo Valley Carmenere/Cabernet Sauvignon. Phew! I'm outta breath! And tired from working on it tonight!

SG had dropped down to 0.994 and was staying stable there. This is within the range suggested by the kit instructions, so I was ready to stabilize and fine the wine. First, though, I attached my Mity-Vac Vacuum Pump to start vacuum degassing of the wine. I pumped like crazy last night, walked away and did some other stuff, came back and pumped like crazy, and on and on throughout the night. When I woke up this morning, I had the worst pain in my left forearm from squeezing that pump so much.

But after some biofreeze, I was back at it after work today. Pump, watch TV, pump, play playstation, pump, fix dinner, pump...

Finally, I felt it was pretty well degassed for what I needed at the moment. I went ahead and added in a half cup metabisulfite/sorbate solution, and used my Mix-Stir to mix that in well (and hopefully, knock some CO2 loose while stirring!) Then I added the Chitosan, and hit the wine again for a few minutes with the Mix-Stir. I believe that it did get rid of some more of the CO2. Next I topped up with some red wine I had around the apartment, and a little bit of water. Finally, I popped back in the bung, and attached the Mity-Vac once more. I've been pumping off and on for a little over an hour, and I believe I have gotten it just about as good as it's going to be. Some bubbles were still rising to the top, so I left the Mity-Vac in vacuum and attached to the carboy. I'll leave it that way over night, and tomorrow remove the Mity-Vac and pop on an airlock. It should clear in about 8 days, at which time, I'll rack to another carboy.

At quarter after nine tonight, that's where I'm at so far. I need to go check on some bottle for my Pumpkin Wine, and if they're ready, I'll try to bottle them tonight. If not, then I'll have to wait a bit longer.

I'll post a follow up tonight or tomorrow depending on what happens with the pumpkin wine tonight.

Monday, June 26, 2006

Blackberries!

After thoroughly enjoying my last couple of tastes of my original Blackberry Wine, and after receiving great feed back on it from family and friends, I decided I need to make a new Blackberry Wine. Unfortunately, if you'll notice from my first posts, I took no notes while making the original batch, so it will not be duplicated. But I will try to come as close as possible. I got the recipe for that one from Jack Keller's Winemaking Home Page. He has about 5 different recipes though, and I think I'm going to try a different one.

I went to the Farmer's Market on Saturday and bought about 28.5 pounds of fresh blackberries at a good price. I used between 14 and 16 pounds for the original, so I'm thinking about making a more full bodied wine this time. Of course, I could make 2 batches of something similar to what I did last time. Sorry, I'm kind of thinking out loud here.

I'm trying to decide which kind of yeast to use. I'm leaning towards a Lalvin RC-212 or a Red Star Pasteur Red yeast, both of which are said to give a bit more of the fruit's flavor to the wine. The alchohol tolerance for both yeasts is around 12 to 14% abv, which should be fine.

The berries are in the freezer in freezer bags. I'll have to wait to start this until I can free up some room in my 6 gallon carboy. It's full of the Carm/Cab right now. Although, I could put the blackberry wine into a 5 gallon carboy once it's ready, and put the rest into a half gallon or gallon jug. I could try to add oak chips to this gallon, or use it for blending, or find some other type of experiment to do with it.

Anyway, In about a year, I should have a fresh new batch of Blackberry wine. I want this one to be my best one ever. It's got a lot to live up to though! I'll have to make a lot of decisions with it - dry, off-dry, or sweet; sur lie; oak; etc...

Carm/Cab Update:
I need to check the SG on this wine. If it's down to 0.992 or so, I'll go ahead and add the stabilizer and fining agents. Then it'll be time to wait for another 8 days before racking!

Friday, June 16, 2006

Merlot Bottled! (Again...)

Last night I felt that my Merlot was properly degassed, so I decided to bottle it once more. After some calculations to determine how many bottles I needed, I used 20 750mL bottles and 4 375mL bottles, with a couple of glasses left over for me. The wine tastes better since degassing, but will need to age a bit more to become even better.

One thing that impressed me about my process last night is that with everything I did, it took a relatively small amount of time and created virtually no mess! I washed the bottles, then sanitized them, racked the merlot into the bottles, and corked them. When all was said and done, it took probably about 3 hours. And like I said, mess free! I told my roommate, Lonzo, that maybe this was a sign of getting better at making wine...


Carm/Cab Update:

I measured SG of the Carm/Cab kit, and it had fallen down to 1.005. I was supposed to transfer to the secondary at 1.010, but I missed it. And as I measured the 1.005 late last night, I still didn't make the transfer. I will do that today. Late update: I did.

Tuesday, June 13, 2006

A couple of things...

Tonight I did a couple of quick things with my wine. I stirred my Carm/Cab that's in the primary right now (as I did acouple fo times yesterday) and checked the SG. It's down to 1.052 on the second day of fermentation.

I also did some work with my Merlot. Yes I bottled it already, but After tasting, I've been really unhappy with the wine. One major reason I've been unhappy is that the wine has still been fizzy. Evidently, I did not degas the wine as well as I should have. Since I have the Mity-Vac now, I decided I would open all the bottles and pour them back in the carboy, thenapply the Mity-Vac Vacuum to the carboy. I believe I got most of the CO2 out as I poured each bottle back in, but to be sure, I pumped the Mity-Vac, and got almost no extra bubbles. Just to make sure, I'm leaving a vacuum on the carboy overnight. I will have to re-bottle and recork tomorrow or Thursday night. It almsot hurt physically to have to undo a couple of days' worth of work to open the bottles, but if it makes the wine better in the long run, then it will have been worth it.

I have to say... I don't want to be one of the people who talks bad about Wine Kits, but the Merlot is so disappointing right now that I'm tempted. If the Carm/Cab, which would have cost an arma nd a leg if it wasn't for a handy gift card from work, turns out badly, then I'm eschewing kit wine forever. I'll have to find a way to start buying Vitis vinifera grapes and crushing them myself if I want to make grape wines after that. But I'm going to work hard as hell to make sure I do everything right with this kit - so I'll know it's not my fault if things turn out badly.

And to finish, scroll down for photos of the Pumpkin Wine after it has been filtered. You won't believe your eyes!

Pumpkin Wine Filtering

I wanted to show how amazing the Mini-Jet filter worked on my pumpkin wine! Here are some before and after photos:

Starting to filter the wine.

In the process of filtering with the mini-jet pump.


Beautiful Wine!

Yes, that is an Ernest Hemingway book behind the carboy...

I told you you could read a book through the wine now!

Sunday, June 11, 2006

June 11th, 2006 - The Day of The Winemaking Work

Good grief! I worked my tail off yesterday on various wine projects! I don't know if there's enough space in this blog to hold all the info of what I did!

Okay, I exaggerate. But there was a lot of wine work going on. It actually all started on Saturday when I made a trip to Alternative Beverage to pick up some new supplies. I grabbed a new auto-siphon (the one I used for transferring the strawberry wine somehow didn't get cleaned quickly enough and had dried pulp on the inside, which I could not get out. So I decided it was time to invest in a new one, along with a length of siphon tubing for racking. I also picked up a glass Wine Thief (which is kind of like a really big pipette - a tube that you stick in the wine and cover the top with your thumb to draw out a sample for testing), a new 5 gallon carboy and a case of 750 mL Cobalt Blue Hock Style Bottles and a case of 375 mL Cobalt Blue Hock Style Bottles. I also rented a Buon Vino Mini-Jet Filter in order to try to help clarify my Pumpkin Wine.

When I got home, FedEx had come and delivered my Mity-Vac.

The Mini-jet filter pumps the wine automatically through it's filters, which are pads of different levels of Microns to allow pass through of the wine and to stop the particles in the wine. On Saturday, I ran the Pumpkin Wine through the #1 filter pads, which are the coarse pads and trap the bigger particles, allowing smaller ones to pass through. This made an amazing difference in the clarity and appearance of the wine. I was very very pleased!

Then on Sunday, I started the Day of The Winemaking Work by using the pump on the mini-jet to rack my Strawberry Wine off the fine lees. I started by crushing 5 Campden Tablets and dissolving them in a bit of water and pouring this solution into the carboy, and finished by topping up the new 5 gallon carboy of racked Strawberry Wine with some extra I had been storing in a gallon jug. The only problem with using the mini-jet to rack this was it seemed like a lot of air got into the wine. But remember that I received my handy new Mity-Vac! I attached that to the carboy and started pumping, pulling a lot of bubbles out. I think this wine is almost completely degassed.

Next, I cleaned and sanitized the carboy which had previously held the Strawberry Wine. I added in a solution of 5 crushed Campden Tablets to this, as well. Then I used a #3, or .5 micron, filter pad on the mini-jet to filter the Pumpkin Wine again. The #3 pads are called "Sterile" and allow on the finest, tiniest particles through. This polished the wine so brilliantly that you could read a book through it!

The instructions for the mini-jet are to wait 2 to 4 days between filtering, but since I was renting the machine, I didn't have that kind of time.

I next put an airlock on the new carboy of this wine, then cleaned and sanitized the carboy which had held the Pumpkin Wine, and cleaned the mini-jet and its hoses.

Then I decided to go ahead and start my new kit - the Chilean Carmenere/Cabernet Sauvignon blend. I started by sanitizing my primary bucket and a long handled spoon. I put in about a half gallon of warm water, then sprinkled in package number 1 from the kit, which is Bentonite (a clay powder which aides in clearing the wine). Following this, I poured in the contents of the juice bag, added cool water to the bag to rinse it out, and poured that into the bucket. Then I added just a bit of water to get the must to 6 gallons. I measured the SG which was at 1.096 - right where it should be (I believe that's around 12.75% abv.) I opened the 4 packets of oak that came with the kit (2 packets of French Oak Chips and 2 packets of toasted oak dust) and sprinkled them into themust, and stirred them under as best as I could. The dust kept floating back to the surface, so I checked Winepress for advice (since the instructions said to stir the oak under the surface) and learned that it was alright for the dust to float. Then I sprinkled the yeast on top of the must, put a lid on loosely, set the whole bucket in a trash bag which I tied over the top (in order to prevent any messy spills which could come with fermentation) and set it in the closet.

Whew! After cleaning my Hydrometer and Wine Thief, I was finally done. I sat back and enjoyed a nice glass of La Conreria de Scalia Dei Priorat wine to admire my day's handiwork. I'll have to stir the Carm/Cab daily for the next few days and check the SG.

It was a wonderful day of working with the wine. I really enjoy having my hands busy with this hobby!

Pumpkin filtered with #1 and #3 filters - buon vino mini-jet
Strawberry Racked and degassed with mity-vac
Carm/Cab started - problems!!! 1.096 starting SG. (Pablo Neruda)

Friday, June 09, 2006

Side by Side Tasting

Last night I was over at Kat's house and we decided to have a glass of wine. I had an open bottle of my VR Merlot, and she wanted some of her Fat Bastard Merlot. I decided this was a perfect opportunity to compare mmy wine to commercial wine. I knew the commercial wine would be better, but I wanted to take the chance to see where mine was lacking so perhaps it could be improved.

The Fat Bastard was dry, had a decent body with some heft to it, very smooth, not terribly astringent, and finished clean. There actually wasn't a whole lot of flavor in it. To me it was definitely lacking in fruit flavor and tannins. But all in all, it was a good merlot.

Mine was fruit forward yet dry, had almost zero body to it, bit back a little bit - especially with mouth-puckering astringency, and finished with a bite. Overall, it needs some work. I really liked the fruit forward flavor without it being too sweet and the tannins, but it lacked in everything else... a lot.

The one thing that impressed me was that the 2 things I thought were missing from the commercial wine were precisely the 2 things I liked about mine. Bias? Quite possibly. But as I'm still learning how to taste wine properly, I can't be sure.

Will my merlot improve with age? I hope so. It is very young still. The kit it came from is marketed as a 4 to 6 week wine kit, meaning 4 to six weeks from the box to the glass. Of course, they do say that it will be even better if it ages. I started this wine a few months ago, but I didn't degas it properly, and it's only been bottled for a few weeks. (The bottle from which I tasted had been degassed thoroughly.) It's my strong hope that this one, as it ages, will mellow out, with the tannins, fruit, and alcohol bonding together to produce more body and less bite. If that happens, I will try another side by side comparison and see how it compares then.

Oh, as far as the other aspects of how wine is judged, my merlot was crystal clear with a beautiful ruby red color, while the Fat Bastard Merlot was a black hole, letting no light escape from it. And as I have been having some allergy problems lately, I couldn't smell a thing from either of the wines.

Thursday, June 08, 2006

What to do about the Pumpkin?

With some ideas about Strawberry Wine

I got in touch with the Member of Winepress (Terry) who created the recipe I adapted for my Pumpkin Wine about how best to clear it. Terry suggested that perhaps I hadn't properly degassed the wine and that held the Sparkolloid mixture up. So as soon as I get my Mityvac, I'm going to try degassing some more. He also suggested I check with Alternative Beverage to see if they would rent me a Mini-Jet Filter. If I ran the wine through this filter with coarse filter pads and it started to clear up some, then I should run it again with sterile pads. If it doesn't clear up through coarse filter pads, then the issue might be a pectin haze - in which case I'll try adding some pectic enzyme and see if that clears it up.

Terry told me that he had never had any prolems with Sparkolloid, so he didn't believe the issue was with the agent. I'm going to try these suggestions he gave me, and rack again to another carboy and try to wait it out. Hopefully it will become clear pretty soon.

The silver lining is that I'm probably going to need to buy another carboy so I can keep the Pumpkin going, along with the Strawberry, and get ready to start my other kit, some new blackberry wine, and have room for blueberry wine in a couple of months. I might have to pick up some muscadines this year as well and try my hand at making wine with them.

If I can get a carboy this weekend, I should probably go ahead and rack my Strawberry Wine again as it has thrown out a lot more sediment. This wine is looking really good! I can't wait for it to be ready either! I'm really thinking about adding some white grape concentrate or possibly even some oak chips. Vanilla Beans have even crossed my mind. I'll be sure to report back what I decide to do.

Until then, have a glass of wine and relax!

Wednesday, June 07, 2006

Pumpkin Not Clear

I promised you a report on the clarity of the Pumpkin Wine after checking it on Tuesday. So here's the report: it's not clear.

Actually, as the Sparkolloid settled down, it got back to around the same clarity it had before I added the Sparkolloid. When I put my hand on the other side of the carboy from me, I can see the faint, blurred shape of my hand through the wine. So it's very close, but not quite there.

Of course, my Strawberry Wine, which is only a couple of months old, is almost clear enough to read a book through, but I'm not talking about the stupid Strawberry Wine.

Sorry for that moment of frustration. I'm actually extremely happy with how the Strawberry Wine is looking. I'll have to taste it again soon and report back on that.

As for the Pumpkin Wine, well, I'm not sure what to do now. I doubt that it's clear enough to filter, and of course I don't have a filter anyway, so that's out. I guess I'll go back to the drawing board and check at Winepress.

I'm just ready to get the Pumpkin Wine into bottles and clear up some carboy space. After all, summer is here and fresh fruits are all over the place! I've got to make some more wine!

Monday, June 05, 2006

Breaking News!!!!!!!!!

Pete Townshend has a blog!

eBay!

So last night I won a Mity-Vac on eBay which only cost me $12.50 plus $16.95 for shipping. These normally retail for around $60. So I saved a great deal! The Mity-Vac is a tool used by mechanics for bleeding brake lines. It's is a hand-held vacuum pump that will attach to a carboy cap and pull a vacuum on the carboy, thereby aiding a ton in degassing. One of the things that messes up most homemade wines is they are not properly degassed (meaning they still have too much CO2 dissolved in the liquid.) The merlot I just bottled is this way, so I picked up a Wine Saver Vacuum Pump for that. This is the Mity-vac I bought.

But today, as I was perusing eBay for other winemaking equipment and the such, I came across this offer. It's one of the most well written things I've ever seen anywhere. I thank heaven that we have people as erudite as this one in the great State of NC.

My only question is Where does one find 100% natural panty hose?

Friday, June 02, 2006

Maintenance

Sometimes I think that maintenance is one of the hardest words in the world to remember how to spell. I mean, from knowing it's root, you would think it should be spelled maintainance, but that just looks silly.

Anyways, in case you haven't noticed, I updated the top of the blog to let people know what this here blog's all about. I received a visit from a fine gentleman named Mike Duffy who advises commercial wineries on how to make their websites the most effective, and I hoped I didn't waste his time. So I wanted to make it easier for people to know that I'm just a lowly home-winemaker-who-will-one-day-rule-the-world-of-commercial-wine-but-not-commercial-yet. Hopefully anyone who comes here by mistake will still look around!

I also discovered that there are many many more Wine Blogs than just mine and Jack Keller's. Who'da thunk it, in a world that has almost as many blogs as people, I wasn't completely unique! Well, after looking through some, I added a few links to my blogroll on your left to the ones that I liked the most. Be sure to check out Home Winery to read the experiences of another Home Winemaker.

That's it for now.

PS- I'm thinking about starting my next kit very soon. It's the Winexpert Selection Estate Limited Edition Chilean Maipo Valley Cabernet Sauvignon/ Carmenere. Hopefully I'll be able to get a Mity-vac soon to help with degassing that one!

Thursday, June 01, 2006

"Hey Rob, how's the pumpkin doing?"

Well, I'm glad you asked! I checked in on it the other day, and boy. It was messed up badly. It looked like all the Sparkolloid mixture got air bubbles in it and it was floating at the top. It looked horrible, the wine wasn't any clearer, and it was just a bunch of sludge up there.

So I decided to take my Mix-stir and just kind of stir things up by hand with it. I broke up the sparkolloid mixture, as it had kind of formed back together at the top. Then I stirred a little bit trying to get everything mixed in well.

That was all on Tuesday. I started the Sparkolloid on Thursday, May 25th. It was supposed to take a week. So I'll look at it today and see how it is. If it's still not looking great, I'll give it until next Tuesday, and then I'm looking for help!!

Update: I checked it last night. It looks like it may be beginning to clear slighty at the top, but it's still pretty cloudy. There is some sediment collecting at the bottom of the carboy, although this may just be the Sparkolloid mixture falling out and not taking anything with it. WORK, SPARKOLLOID!!!

I guess we'll see how it is on Tuesday!

Did you know...

...that winemakers in California Wineries last year earned an average of $92,435? That's an increase of about 10% since 2001 according to a poll published by Winebusiness.com. Lots of interesting Wine Industry salary averages and ranges there. The Range for Winemakers' salaries was dependant on the size of the winery. The midsize wineries, which produce 50,000 to 99,999 cases of wine a year, had the highest numbers in the range - from a low of $61,774 to the highest of $183,550.

Now this does seem to be based on Wineries in California, but I would imagine that the salaries would be similar with the differences in the cost of living between the different areas.

Just some food for thought for what I might want to do sometime in the future...